Your windows are more than just an investment for your home. They also can be another way for you to express your personal sense of style.
Here are 5 unique window treatments that make your windows stand out from the crowd:
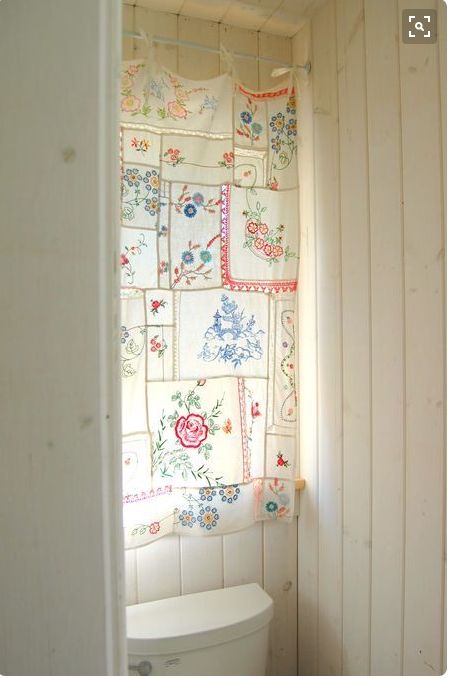
Vintage Hankie Curtains
Do you have a collection of vintage handkerchiefs from a relative? Or are you fond of thrifting for interesting finds?
Turn all those gorgeous old hankies into a unique window treatment by sewing them together.
The beauty of this type of window covering is the handkerchiefs are sheer enough to let light through, but opaque enough to give you privacy.
Shabby Rag Ribbon Valance
Give your room a little sense of whimsy with a shaggy rag ribbon valance.
You can use vintage fabrics, scrap fabrics, or patterns that coordinate with the rest of your room to craft an interesting handmade window addition.
Pair your new valance with some cream or white sheer curtains and you’ve got a fun addition to your home.
Doily Upcycle
Similar to the vintage hankie curtain, sew together all those beautiful old doilies to create a fun, funky window treatment.
If you don’t want to have a bunch of different doilies for a curtain, find an old lace table runner and use that. You can even add ribbon, fabric, or small doilies to the edges for some added interest.
Plant Valance
Why stick with just fabric for your windows?
With some strong twine or hooks, hang small vases from your curtain rod and add flowers.
Change things up as often as you want for a fresh new look, or buy some silk flowers for a more permanent installation.
This idea is a great way to bring some small plants into your home even if you don’t have the shelf space to house them.
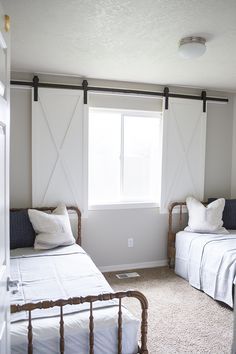
Barn Doors
Barn doors are a big trend in home decor, but they’re usually reserved for acting as actual doors.
Putting smaller barn doors on your windows is a great way to block out the light and bring the trend into your home without committing to a large-scale change.
https://www.selecthomeexteriors.com/wp-content/uploads/select-home-exteriors.png00Jeni Lubberthttps://www.selecthomeexteriors.com/wp-content/uploads/select-home-exteriors.pngJeni Lubbert2023-03-21 16:48:082023-03-21 16:48:105 Unique Window Treatments to Make Your Windows Stand out
Your home has vinyl siding, and it’s still in great shape. There are no holes or gaps, and you think you can get several more years out of it.
But there’s one thing that’s bugging you: It isn’t the right color.
Whether you’ve got boring neutral siding and want something a little more bold, or the previous owners went a little too wild with their imaginations and you want to tone it down a little, you may be wondering if there’s hope for your unfortunately colored vinyl siding.
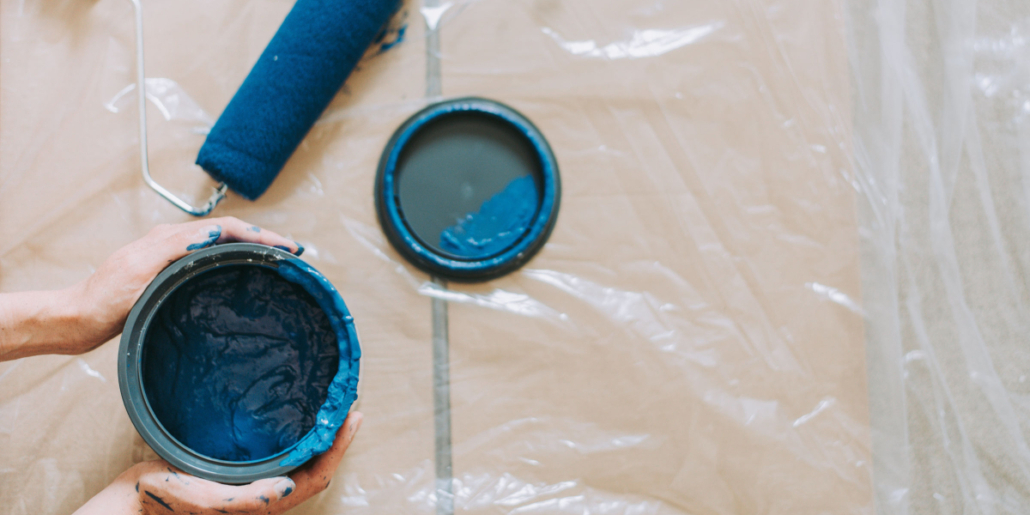
Good news! You can paint your vinyl siding with some preparation and know-how.
Before You Paint
Hold off on getting out all those brushes and paint cans; there are a few things you need to keep in mind when preparing to paint your vinyl siding.
Check Your Warranty
Before you paint your vinyl siding, check the warranty.
If the warranty is still active, confirm that painting your siding won’t void the warranty. If it will, you may want to wait and save up to replace the siding.
For warranties that do permit painting, be sure that you follow all the manufacturer’s stipulations for type and color of paint to use. Using the wrong products, even if painting is allowed, will still void the warranty and leave you out of luck if you find a defect.
If the warranty isn’t active, you’re good to go!
Using Primer
Whether or not you use primer depends greatly on who you talk to about painting your siding.
Some people recommend using primer all the time, while others recommend it only in cases where the siding is pitted or shows signs of other deterioration.
A good rule of thumb is to follow the recommendations of your paint manufacturer regarding primer. If primer is recommended on the can for your colored paint, then you probably should use it.
Just remember that paint sticks to the layer beneath it, so be sure any primer you use is formulated so your paint will stick to it.
Expect Expansion
Your siding takes a beating, and you need to make sure the paint you choose is up to the job.
Vinyl siding is manufactured to expand and contract with the weather conditions. This may mean you’ll see a gap in your paint colors at the seams during colder weather.
Choose Color Carefully
Vinyl siding is created to absorb a certain amount of heat. Because of this, you shouldn’t choose a paint color that’s darker than the color of your current siding. If you do, you run the risk that the siding will become too hot and crack.
How to Paint Vinyl Siding
Painting vinyl siding is a big job, but it’s not something that’s insurmountable as long as you’re prepared.
Here are the steps you need to follow to paint your vinyl siding:
Gather Materials
To paint your vinyl siding, you will need:
Garden hose with spray nozzle
Bucket
Powdered laundry detergent
General-purpose cleaning powder
Oxygen bleach
Soft-bristle brush, sponges, or rags
Painter’s tape
Masking material
Paint roller with ½-inch nap roller covers or spray paint equipment
Paintbrushes
Mix the Cleaner
In your bucket, mix a cleaning solution of ⅓ cup powdered detergent, ⅔ cup cleaning powder, and ⅔ cup oxygen bleach for each gallon of water.
Clean the Siding
Begin by rinsing your siding with the hose with spray nozzle. This removes any loose dirt and debris.
Next, gently scrub the siding with your cleaner and a soft-bristle brush, sponge, or rag. Work in small sections from the bottom up, thoroughly rinsing each section as you finish.
Hand-scrubbing is much more effective than power-washing, getting your siding better prepared for the new layers of paint.
Allow the siding to dry completely before moving on to the next step.
Mask off Trim, Doors, & Windows
Using your painter’s tape and masking material, cover any areas you don’t want painted or where you wouldn’t want accidental paint drips. This includes doors, windows, trim, and any hardware.
Prime Siding
If you’re using a primer, carefully apply it to the siding using your roller, paint sprayer, or brush.
For roller or paint sprayer applications, always backbrush, meaning you follow up the roller or sprayer application with a brush to smooth out the surface and remove drips or heavy application.
Allow the primer to dry per the manufacturer’s instructions.
Apply Paint
Paint your siding using the same technique you used for painting, applying an even coat to the siding. Allow the paint to dry per the manufacturer’s instructions, then apply a second coat.
Clean up the Painting Site
Once the paint has dried, remove all masking materials and make any touch-ups that may be necessary.
Professional Vinyl Siding Installation in MD
At Select Home Exteriors, we realize your home is your biggest asset. That’s why we work hard to help you keep it in the best shape possible, whether you plan to live there for years or are preparing to sell. Our professional siding installers make quick work of your siding installation project, taking exceptional care in everything we do. Schedule your free siding consultation today!
https://www.selecthomeexteriors.com/wp-content/uploads/select-home-exteriors.png00Jeni Lubberthttps://www.selecthomeexteriors.com/wp-content/uploads/select-home-exteriors.pngJeni Lubbert2023-03-21 16:40:562023-03-21 16:40:57Can You Paint Vinyl Siding?
When you renovate your home, you’re likely left with old fixtures that you don’t know what to do with.
If you’ve added new windows to your home, take advantage of one of the hottest trends in home decor by repurposing those old windows into something fun.
Here are 9 ways to repurpose your old windows:
Headboard
Looking for a unique touch in your master or guest bedroom?
Rather than the traditional wooden or fabric headboard, hang several windows above the head of your bed to create a light, airy headboard.
You can hang as many or as few windows as you want to create a more dramatic effect. It’s best to use identical windows for this project to maintain symmetry.
Divider
If you’ve got a large room, such as your family/dining room, that you’d like to add some visual definition to, old windows are a great option!
Hang windows securely between the two spaces you’d like to define, attaching rows of windows to one another if you’d like.
This creates a visual separation between two areas without heavy furniture such as bookcases.
Mini Greenhouse
Growing your own food is a great way to save some extra money, and creating your own mini greenhouse can keep you in fresh greens all year long.
Construct a wooden box out of lumber, then use windows as the lid. This allows sunlight and warmth to reach your plants so you can have great produce even when it’s colder outside.
Chalkboard Calendar
Need a great-looking way to keep everyone’s schedule or your meal plan visible?
Either replace the glass of an old divided window with a chalkboard slab or paint the glass with chalkboard paint for an erasable calendar.
Alternatively, you can put a board painted white behind the window and write on the glass with dry-erase markers.
Stained Glass Window
If you’d like to add a classy touch to your home but don’t want to fork over the money for a professionally done stained glass piece, turn an old window into a custom piece of art!
Sketch the design you’d like for your window on some paper and place it behind your window for easy tracing.
Create outlines with clear silicone caulk, then fill in your design with pieces of colored glass or colored glass stones you can find at the craft store.
Artwork Backdrop
Larger mats and frames make even the most simple artwork stand out.
If you’ve got a special piece you’d like to highlight, or want to take up some extra space on your wall or mantle, add an old window behind the framed artwork for a little boost.
This method adds space and gravity to your art without adding the heavy materials you’d need if using another frame.
Fireplace Screen
Keep your fireplace ashes where they belong while being able to enjoy the beauty of your fire by creating a fireplace screen out of an old wooden-framed window.
Attach legs to the bottom to keep it level, and be sure that you keep the window far enough from the flames when it’s in use that it won’t catch light.
Jewelry Organizer
Keep all those necklaces untangled and close at hand by turning an old window into a DIY jewelry organizer.
Attach small screw-in hooks to the edges of the window’s frame, and hang it on the wall securely. You can even add a little cotton batting and some fabric to turn one panel into earring storage.
Pot Rack
Free up some cabinet space by moving your pots and pans storage overhead.
Remove the glass from an old wood-framed window and use chains and hooks to secure the window to your ceiling, low enough that you’ll be able to reach your pots and pans but not so low that you’ll hit your head on them.
Some S hooks on the edges of the window frame can be used to hold those pots and pans for easy cooking.
Professional Window Installation in Central Maryland
Your home’s windows work hard. Get the high-quality brands you deserve, backed by exceptional installation and top-notch customer service when you call Select Home Exteriors. Our professionals will never pressure you to buy more than you need, and we’re available to answer any questions you may have about your project. Schedule a consultation today!
https://www.selecthomeexteriors.com/wp-content/uploads/select-home-exteriors.png00Jeni Lubberthttps://www.selecthomeexteriors.com/wp-content/uploads/select-home-exteriors.pngJeni Lubbert2023-03-21 16:37:262023-03-21 16:42:049 Ways to Repurpose Old Windows
Decks provide the perfect canvas for outdoor entertaining. You can make them as simple as you want, just complimenting your home’s exterior, or elaborate to really draw the attention of passersby.
At Select Home Exteriors, we love building gorgeous decks for our clients, giving them the space to host barbecues and watch kids jump into the backyard pool, while adding an extra element of style.
To help you get a jump start on your deck planning, we’ve found 6 of our favorite decks on Houzz, the source for all things home renovation:
Traditional Deck, Baltimore
This 20’x20’ covered deck space is like an outdoor living room! With ceiling fans, a built-in fireplace, and mounted TV, it’s a great spot for a family movie night, or a date night in.
We love the barn doors to protect the tv when not in use.
This area is just one part of a much larger deck concept, including dining area and built-in cooking area, making this a complete outdoor entertainment space!
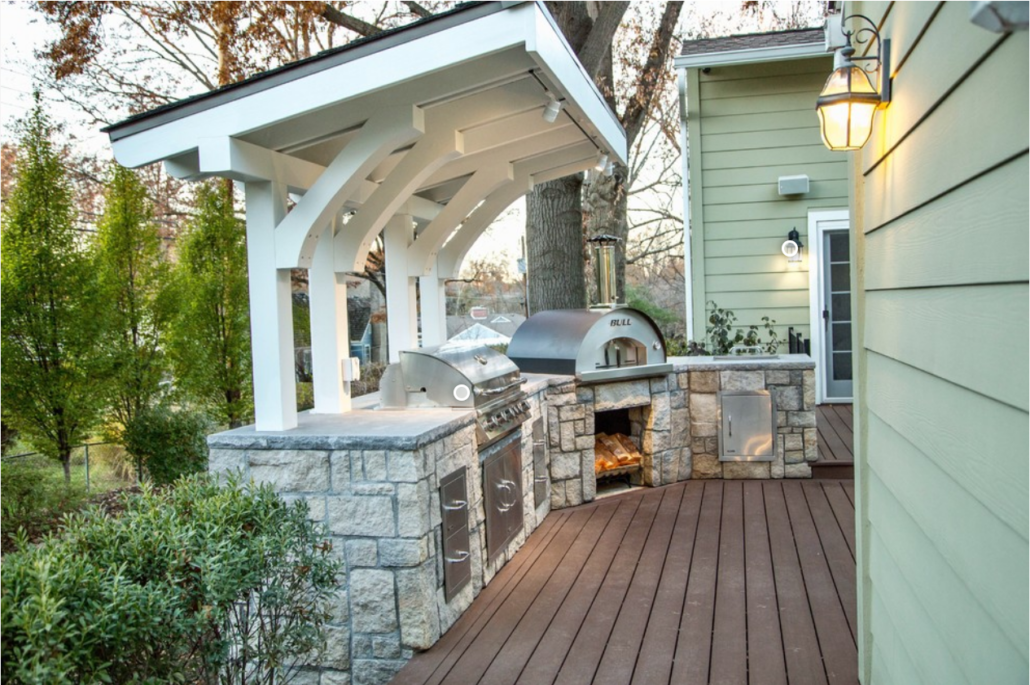
BBQ Deck Project
This deck with built-in grill and smoker is every man’s dream!
The rock facade throughout gives the cooking area a nice rustic feel, while tying together the bright white cover with the darker color of the floor. Simple corbels add some visual interest without being too busy.
Atlanta Backyard Retreat
The sleek lines of the concrete fire table and the floating cedar bench give this deck a clean, contemporary feel. The light brown cedar theme continues in the pergola over the dining area, as well as the privacy screen walls, providing a cohesive look throughout.
Traditional Deck – New York
This exotic Ipe wood deck with an unobstructed view of the garden is the perfect place to relax at the end of a long day.
Our favorite part is the unique lines provided by a custom curved bench, made from laminated redwood.
Schiff
Get the look and feel of a Japanese-inspired spa getaway with this deck!
The wood is unfinished, allowing it to age and gray beautifully. With a concrete single block fire pit and a sunken-in round hot tub, you’ll never want to leave!
Trex Deck and Pergola
We are loving the contrast of the bright white pergola and posts with the dark composite flooring and black balusters throughout this outdoor kitchen.
Two tiers break up the deck into separate “rooms” for cooking and dining. Lighting installed on the posts and the stairs ensure you can enjoy this space at all hours.
Custom Deck Design & Build in Maryland
Did our favorites from Houzz get your creative juices flowing?
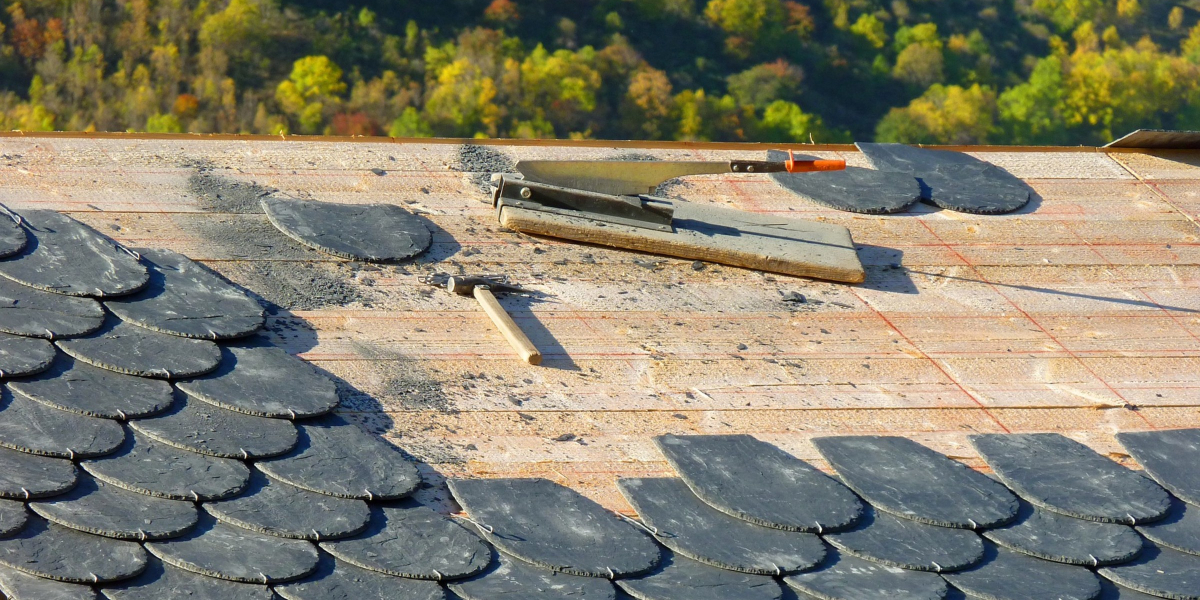
As you’re up on your ladder doing some gutter cleaning, you notice a few missing shingles. Or, perhaps you’ve seen a small wet spot spreading on the ceiling of your attic, a sure sign that you’ve got an issue with your roof.
Getting up on the roof to nail down a new shingle or replace a few problem areas isn’t that big of a deal, right? It’ll save you a ton of money over hiring a roofer, and the job can’t take too much time, can it?
Stop!
Before you try to tackle that roofing project on your own, whether it’s a small repair or a full replacement, here are 4 reasons to consider hiring a roofing contractor:
Safety
Roofing is dangerous work.
If you aren’t experienced with walking along your roof, let alone trying to balance yourself while holding a hammer, one misstep can spell disaster. You could damage your roof or your home, or seriously injure yourself.
Roofers, on the other hand, know how to walk and balance while doing their work. While accidents do happen, they are far less likely to happen to an experienced roofer than they are to a homeowner trying to DIY a fix.
Expense
While it may seem that you’re saving tons of money by doing the job yourself, you have to consider that your inexperience may lead to other issues that need corrected.
You could incorrectly fix the problem, causing you to re-buy the materials necessary and have to spend more time working on a solution. Or, your work could cause another, more serious and expensive, problem with your roof that needs to be fixed.
In addition, those simple missing shingles you see could be the sign of a larger problem that needs to be remedied before more damage is done.
An experienced roofer knows what to look for and can spot problems that you may not notice, getting them fixed earlier and for less money than if they were left for longer.
Liability
If you get injured while up on your roof, not only do you have to pay for your medical bills, but your homeowner’s insurance premiums take a hit.
Roofing contractors, on the other hand, carry special insurance to protect homeowners in the event that one of their workers gets injured. This leaves you with less financial and legal liability, which could make a big difference in your normal operating budget.
Liability also extends to your roof’s warranty.
In many homeowner’s insurance policies, as well as the roofing manufacturers’ warranties, there are clauses that state the warranty on all materials is voided unless repairs or installation is done by a licensed, certified contractor. By taking on the job yourself, you’re running the risk of not having a true defect covered by your insurance or the warranty if something happens down the road.
Quality
You may be the most careful, conscientious DIY-er in the world, but your work is unlikely to rival that of someone whose entire job is to install and fix roofs.
A quality contractor will get your roofing job done quickly and correctly, and can service any further problems you may have with your roof. This gives you peace of mind knowing that, even though you may have spent more money at the outset, you’ve got the protection of the contractor’s experience and knowledge backing up your project.
Skilled Roofing Contractor in Central Maryland
At Select Home Exteriors, we have years of experience working on roofs of homes and businesses throughout central Maryland. We know what types of materials hold up best in the climate, and we recommend only those brands that we’ve seen withstand the test of time.
https://www.selecthomeexteriors.com/wp-content/uploads/select-home-exteriors.png00Jeni Lubberthttps://www.selecthomeexteriors.com/wp-content/uploads/select-home-exteriors.pngJeni Lubbert2023-03-20 16:41:482023-03-20 16:45:02Should I Hire a Roofing Contractor or DIY the Job?
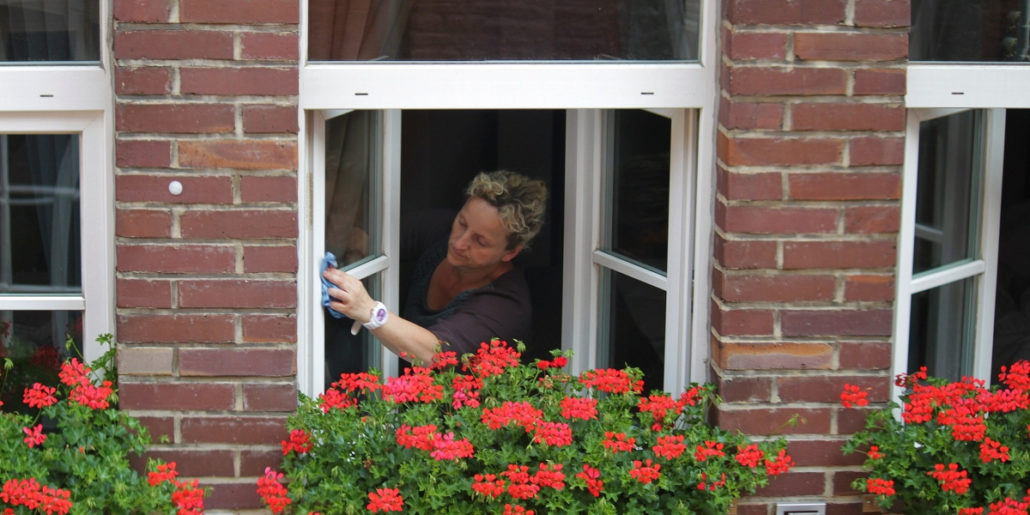
Your home’s windows are among the most important – but most neglected – assets.
They keep rain, snow, and inclimate weather out, while helping you maintain a comfortable temperature inside. On sunny days, you can throw open the curtains and look outside, basking in the scenery.
To ensure that your windows stay in great condition year after year, follow these 5 tips for window care so they last:
Clean Regularly – and Gently
Keep that glass sparkling and avoid conditions that could cause damage by cleaning your windows regularly. Most people do this task twice a year – in spring and fall.
If you have wooden windows, gently wipe them down with a soft damp cloth. This helps remove any dirt and dust that may collect without introducing harsh cleaners.
Be careful to not use too much water, as that can seep into your window casements and sashes and encourage rot.
Wash vinyl and aluminum-framed windows with a gentle detergent, such as dish soap, and a soft scrubbing brush.
When cleaning windows, make sure to clean not only the casement but also the area around the window. This removes any built-up dirt that can collect in the mechanism and cause sticking.
Keep your glass sparkling with window cleaner or a homemade mix of vinegar and water. Avoid using cloths or paper towels to clean the glass, as you can leave behind tiny fibers that dull the shine. Instead, use a piece of crumpled-up newspaper to wipe away the window cleaner.
Inspect Often
As you clean your windows twice a year, carefully inspect them for signs of damage or disrepair.
Check the condition of the window frame and sash and, for wooden windows, use a small metal probe to look for soft spots, which mean you’ve got rotting.
If you have double- or triple-paned windows, look carefully for signs of moisture between the panes. This means your seals have broken, reducing the insulation capacity of the window. Replace any broken seals.
Look for signs of peeling or warped paint, especially on windows that get the most daily sun exposure.
If your windows have weather stripping, check its condition and replace any that has worn out.
Feel around the windows for air gaps and fill with latex caulk.
Check the Sealing
The sealing around your windows helps keep outdoor air out, making your home more energy-efficient. Keeping it in good repair is important to maintaining lower energy bills and a more comfortable inside temperature.
If you notice broken or cracked seals, moisture inside your window panes, or feel air coming in around your window, your sealing needs attention.
Call a window contractor or handyman to replace your window seals, or attempt the project yourself. For air gaps around the window, fill them in with spray sealant or caulk.
Repaint Regularly
Sun and temperature differences can greatly damage the paint on your wooden and metal frames over time.
To keep your window frames looking great and protected from damage, repaint them every three to four years with a paint that’s recommended by your window’s manufacturers.
Before you begin painting, clean the windows thoroughly and make sure they’re dried. Be careful to not paint over any moving parts, as this can lead to your windows being unable to open.
Repair Damage
If you notice something on your window that’s broken or missing, get it fixed quickly. The longer you leave your window damaged, the more energy you’ll lose and the more expensive the repair may end up being.
Many small repairs, such as signs of rot or missing sealant, can be done on your own. For more extensive problems such as broken glass, you may need to call a professional.
Experienced Window Contractor in Central Maryland
Your home is your biggest investment, and keeping your windows in good condition is part of protecting that investment. Whether you need some window repairs or are looking to replace your existing windows, the team at Select Home Exteriors gets the job done quickly, professionally, and affordably. We work side-by-side with you to select the exact products for your unique job, keeping you updated on the status of your project from start to finish. Call today for a consultation!
https://www.selecthomeexteriors.com/wp-content/uploads/select-home-exteriors.png00Jeni Lubberthttps://www.selecthomeexteriors.com/wp-content/uploads/select-home-exteriors.pngJeni Lubbert2019-07-29 16:51:362023-03-21 16:53:335 Tips for Caring for Your Windows So They Last
A roof is such an integral part of any home, and yet it is often overlooked in home maintenance routines.
Your roof acts as your home’s defense against heat, cold, rain, snow and wind. Regular exposure to these elements slowly but surely contributes to its deterioration. But with a little bit of maintenance, and some help from a professional, you can slow down the damage and your roof could last as long as 30 years!
Below are the 4 most important things you can do to maximize the lifespan of your roof:
Perform Regular Maintenance
Regular cleaning and maintenance, about twice a year, will go a long way in keeping your roof looking and working its best.
At the beginning of fall and spring, sweep off any debris such as leaves, sticks, and any rogue frisbees.
Use a power washer to remove any mold. Roof mold retains moisture which can cause shingles to deteriorate and even rot completely.
Don’t forget to clean out your gutters so that water can drain off your roof, preventing rotting shingles and flashing.
Invest in Preventative Care
Investing in preventative care now will prolong the need to replace the entire roof.
Start with having any overhanging tree limbs trimmed and removed. A severe storm could send a nearby branch right through your roof!
Next, make sure your attic is adequately insulated to prevent moisture buildup. If it still seems too humid, you may want to invest in a ventilation fan. Any moisture could produce rot and, therefore, leaking.
Inspect Often
The best way to catch problems before they start is to look at your roof! Inspect your roof as often as you think to. Keep an eye out for:
Debris buildup
Missing shingles
Detached gutters
Mold
Leak in ceiling
Sagging
Inspecting your roof does not require you to get on top of it. Simply remind yourself to glance at the roof whenever you are coming or going from your home. Eventually, it will become habit.
You should also take a closer look all around after any strong storm. Check your ceilings as well to make sure there are no new leaks.
Hire a Professional
These days, a search for “how to fix (fill in the blank)” will bring up hundreds of do-it-yourself instructional videos.
A DIY project may seem like a more cost-effective solution but, in the case of your roof, it could prove more expensive.
Let a professional manage your repairs. They have been well-trained in how to locate and deal with any problems.
For the same reason, you should let a licensed roofer inspect your roof annually. Even if you are in the habit of inspecting regularly, a professional will be able to catch potential issues much earlier, ensuring your roof lasts as long as possible.
Your Source for Quality Roofing Repair in Frederick County, MD
https://www.selecthomeexteriors.com/wp-content/uploads/select-home-exteriors.png00Jeni Lubberthttps://www.selecthomeexteriors.com/wp-content/uploads/select-home-exteriors.pngJeni Lubbert2019-07-29 16:47:512023-03-21 16:56:174 Tips to Help Your Roof Last for Decades
A severe storm can wreak havoc on your roof and, along with it, your budget. When someone comes knocking at your door offering an amazing deal for a free consultation, or even a free roof, you may feel relieved. But wait! You could be encountering a “storm-chaser.”
Before you sign up with that guy that showed up at your door, you’ll want to do some research.
What Is A “Storm-Chaser”?
A storm-chaser is a roofer who pays attention to where large storms have hit, and travels there to take advantage of vulnerable homeowners. They will often show up unannounced, passing out flyers or knocking on doors, offering a deal that seems too good to be true. In reality, they take the payout from your insurance company and do the bare minimum, pocketing the difference. A few years later, you need to replace your roof again because of their shoddy work. Protect yourself from these scams by taking these steps:
Take Your Time
When dealing with something as important as your roof, you may feel a sense of urgency. These scammers are counting on it. A rash decision could end up costing you more in the long run.
It’s important to take the time to make sure you are dealing with a legitimate company. Don’t sign anything or pay up front until you have thoroughly checked them out. Many of these scammers actually do more damage to your roof during a “free inspection” to ensure that the insurance company will pay.
Ask To See Proof of Legitimacy
It’s not uncommon for a client to ask their contractor for information about their license or insurance. If the contractor hesitates, you should as well. Check the status of their license in your state. If they are from out of state, make sure they are allowed to practice in your state. Ask for proof of liability insurance and make sure they have workman’s compensation included.
Visit The Office
A legitimate contracting business should have a physical address. If you are given information with only a P.O. Box address, that is a red flag. Make sure that there is an office in your area that you can visit should a problem arise in the future.
Ask For References
Testimonials are a great way to make sure that you are dealing with a contractor who will do quality work. Ask for a list of previous job sites and visit them to make sure they exist. Look the company up on the Better Business Bureau to see read reviews, including any complaints.
Reliable Roof Replacement in Central Maryland
Select Home Exteriors has over 20 years experience providing home services in Frederick County and the surrounding areas. We are BBB accredited, and our customers will tell you that you are working with the best. Contact us to schedule a consultation! Our experienced roofers answer any questions and help you make the best decisions that fit well within your budget. Call today for a consultation!
https://www.selecthomeexteriors.com/wp-content/uploads/select-home-exteriors.png00Jeni Lubberthttps://www.selecthomeexteriors.com/wp-content/uploads/select-home-exteriors.pngJeni Lubbert2018-12-21 10:00:122023-03-21 17:00:204 Tips For Checking out That “Roofer” That Showed Up at Your Door After a Storm
Looking for new or replacement windows for your home isn’t as simple as you may think. There are many factors that go into the decision-making process, some of which you may never have considered before. Here are a few of the most popular window types for you to consider, along with what makes each of them unique.
Single- & Double-Hung Windows
These two similar styles of windows are the most popular and common styles in the US, and it’s easy to see why. They’re made up of two separate sashes which open and close the window by sliding up or down (to be specific, single-hung windows can only open from the bottom by sliding up, while double-hung windows can open from either end). This style of window is timeless and simple, and is one of the better options for any style of modern home.
Slider Windows
Another popular style of window, these consist of two panes that can be opened by sliding over or under one another. Since these are installed horizontally, they tend to be much wider than the single- or double-hung windows, allowing for more coverage. Due to the fact that only one window can be open at a time, however, this style provides less ventilation. These are very popular in kitchens, living rooms, and other areas of the house that benefit from more exposure.
Casement Windows
For a more modern and contemporary look, casement windows are ideal. Unlike the sliding mechanics of the hung windows or the slider windows, casement-style windows pivot on hinges, opening like doors. They’re taller than they are wide and because they swing open, they consistently provide a great deal of ventilation. Due to the nature of their mechanics, however, these windows work best in warmer and more mild climates.
Awning Windows
As their name suggests, these windows are hinged at the top and open out from the bottom, creating the appearance that an awning is being opened. While they can be popular on their own in more coastal areas, they’re most popular when installed below larger windows.
Bay Windows
Made of three or four large vertical panes, bay windows make a bold statement by helping make a room appear larger. Due to their large size and impact, they’re perfect for adding a great deal of natural light into smaller areas like bedrooms and breakfast nooks.
Experienced Window Contractor in Central Maryland
New windows can give your home a light, airy facelift as well as greatly improving the energy efficiency of your house. For more than 20 years, the team at Select Home Exteriors has installed high-quality windows of all sizes, shapes, and styles in homes throughout central Maryland. Are your windows sapping the heat from your home? Call today for a free window replacement estimate!
https://www.selecthomeexteriors.com/wp-content/uploads/select-home-exteriors.png00Jeni Lubberthttps://www.selecthomeexteriors.com/wp-content/uploads/select-home-exteriors.pngJeni Lubbert2018-12-18 10:00:142023-03-21 17:04:19Choosing New Windows: A Guide to 5 Popular Styles
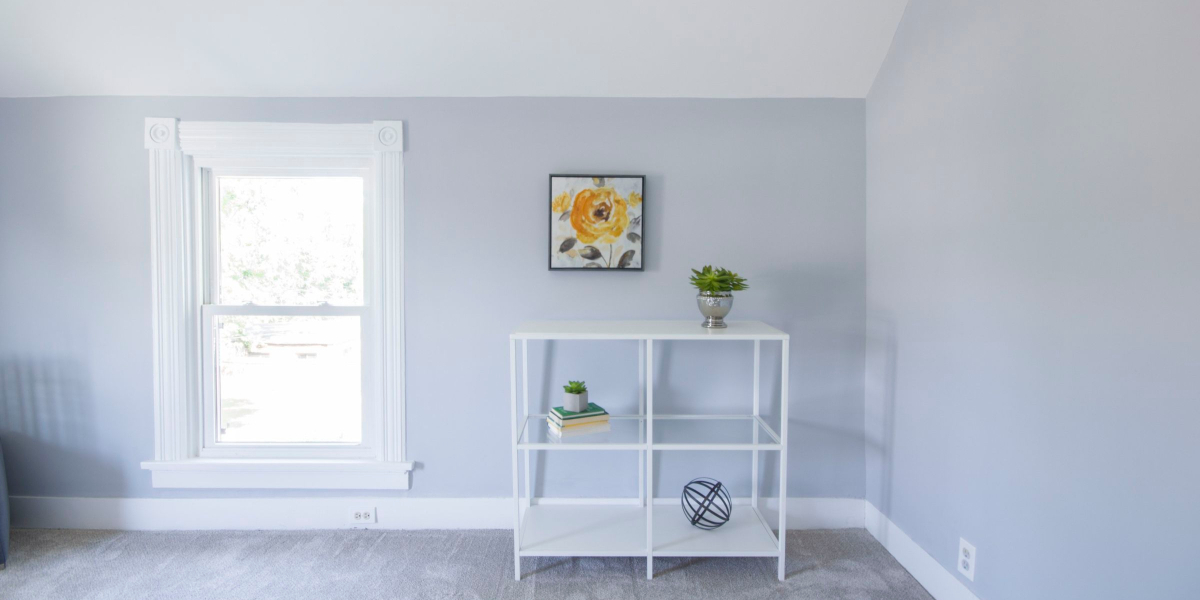
When deciding to renovate your home, thinking about what the project will do for your experience living there is likely foremost in your mind. As you decide which projects to tackle, you may wonder which are the most likely to be most profitable if you eventually decide to sell your home. Although you may not be thinking about selling now, it’s wise to consider the most impactful projects for your budget, especially if you’re limited on what you can spend.
Here are 4 exterior home renovation projects that are likely to net you the most profit when selling your home:
Adding a Deck
A well-constructed deck adds extra entertaining and living space, as well as curb appeal, to any home. Prospective buyers will be able to imagine having backyard barbecues, relaxing with a cup of coffee, or watching their children play when they see a deck in your backyard.
Opt for pressure-treated wood or hardwood whenever possible, as these materials add an extra air of sophistication to your deck that other materials don’t. Small or large doesn’t really matter much, but if you’ve got a smaller yard be sure not to create a deck that’s too oversized for the space.
Landscaping
There’s no better way to boost your home’s curb appeal than by making the yard as inviting as possible. Although landscaping can be done yourself, if you’re seriously thinking of selling or your yard is in rough shape, it may be worth the money to hire a professional team.
Making sure all your trees and shrubs are trimmed up, walkways are clear and in good condition, and that there’s aesthetically pleasing color surrounding your house can go a long way toward getting people to take a second lap around the block when you put up that For Sale sign.
Replace Siding
This is especially true if your siding is old, in poor repair, or a difficult-to-care-for material such as wood. New siding gives the entire exterior of your home a facelift, and potential buyers love seeing notes that the siding recently was replaced on your disclosure sheets or listings.
Be sure to choose a siding type and color that fits in with the rest of your neighbors, as the home on the block that doesn’t look similar enough can be a drawback for some buyers.
New Windows
This project will reap benefits for your family as well as any future selling opportunities. When you replace old windows that aren’t in the best shape, your energy bills decrease, saving you money. They add to your home’s curb appeal and are another project that potential buyers will be happy to see listed as a “recent update” on your listing.
Experienced Exterior Home Contractors in Central Maryland
At Select Home Exteriors, we know you want to get the most for your money when you decide to do a home renovation project. Our team works with you every step of the way, making sure each choice falls in line with your budget, your style, and your needs for your home. Schedule a consultation today!
https://www.selecthomeexteriors.com/wp-content/uploads/select-home-exteriors.png00Jeni Lubberthttps://www.selecthomeexteriors.com/wp-content/uploads/select-home-exteriors.pngJeni Lubbert2018-12-13 10:00:412023-03-21 17:07:364 Exterior Home Renovation Projects That Pay Off When You Sell